On its initial display, the Add New Data Connector overlay contains the following:
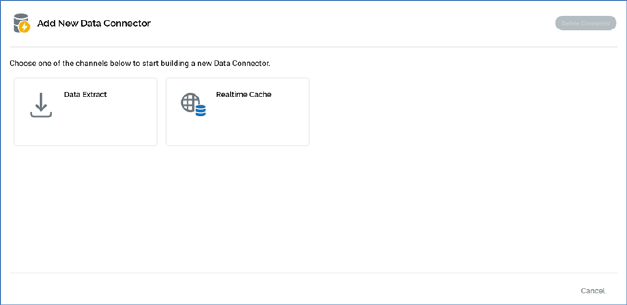
One button is shown for each configured channel of the supported types (data extract, realtime cache, Salesforce CRM and LiveRamp). The selected channel will be leveraged when the new data connector is executed. Choose a channel to continue.
A single button is shown at the bottom of the overlay:
•Cancel: clicking this button removes the overlay from display.
Having selected a channel, the following is shown in the Add New Data Connector overlay:

A validation status indicator is shown at the top of the overlay. When the data connector is invalid, it appears as follows:

Clicking the indicator lists validation errors in a dialog.
When the data connector is valid, the indicator appears as follows:

The data connector’s name property is displayed at the top left of the overlay.

Its name defaults to ‘[Channel Name] Data Connector’. If a data connector with this name exists already, an integer is appended to ensure uniqueness. This value can be incremented.
Provision of a name for the data connector is mandatory, and the value provided can be a maximum of 100 characters in length. The name supplied must be unique across data connectors.
A toolbar exposes a single enabled option:
•Save: clicking this button replaces the New Data Connector overlay with the Manage Data Connector overlay. The Clone and Save menu option, accessed from save, is disabled.
A tabset is shown, exposing Data Source, Schedule and Channel Configuration tabs. Each is documented separately.
Two buttons are shown at the bottom of the overlay:
•Cancel: clicking this button removes the overlay from display. The button is protected by an ‘Are You Sure?’ dialog.
•Save & Close: clicking this button saves the data connector and removes the overlay from display.