The top section in the Reporting Hub displays four options:

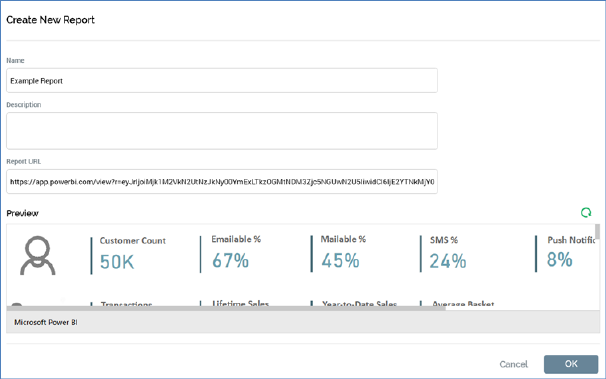
•Create New Report: clicking this button displays the Create New Report overlay, in which you can specify a new report's details:

o Name: this mandatory property can be a maximum of 100 characters in length.
o Description: this optional property can be a maximum of 1000 characters in length.
o Report URL: this mandatory property allows you to define the report's URL, which must be well formed.
o Preview: a preview of the report is shown on leaving the URL field, having provided a well-formed URL therein.
o Refresh: this button causes the preview to be reloaded.
o OK: clicking this button displays the Save the new Report File System Dialog, in which you can save the report to the RPI file system. Reports are saved with a 'Report' file type.
o Cancel: clicking this button displays an 'Are You Sure?' dialog, before removing the Create New Report overlay (if requested).
•Open Existing Report: this button allows you to choose an existing report to view or edit. Clicking it displays the Open Existing Report File System Dialog, in which you can choose a report and double-click it, or click OK, to open it in a Report Viewer tab.
•Create New Dashboard: clicking this button allows you start the process of creating a new dashboard. For more information, please see the Dashboard Designer documentation.
•Open Existing Dashboard: this button allows you to choose an existing dashboard to view or edit. Clicking it displays the Open Existing Dashboard File System Dialog, in which you can choose a dashboard and double-click it, or click OK, to open it in a Dashboard Viewer tab.