The Linked Nodes tab allows you define relationships between nodes in different hierarchies.
Take an example of an organization with Geography and Product/Service Line hierarchies:
•Geography: subdividing the organization by geographical location – e.g. North America and EMEA; within North America, USA and Canada.
•Product/Service Line: subdividing the organization by the types of product or service that it offers: for example, Banking and Insurance; within Banking, Savings Accounts and Credit Cards.
By default, an interaction that is attached to the USA node will also be able to be attached to both the Savings Accounts and Credit Cards nodes. However, if an explicit link is created to Savings Accounts from USA, it will no longer be possible to attach the interaction to the Credit Cards node.
It is possible to associate users with organizational hierarchy nodes using organization node user groups; using this mechanism it is possible to restrict access to financial information as per the previous example. Please see the User Groups configuration documentation for further information.
The Linked Nodes tab is only displayed when a node is selected in the hierarchy details panel.
The Linked Nodes tab contains the following:
•Toolbar: the toolbar exposes the following options:
o Add a new Linked Node: invocation of this option displays the 'Link Hierarchy Nodes' Hierarchy Explorer.
The Explorer contains the text 'Link nodes to [CurrentNodeName] From the [CurrentHierarchy] hierarchy'.
A treeview representation of the organization’s hierarchies is displayed (the current node’s hierarchy is not shown, as it is not permitted to link a node to another node within the same hierarchy). Within the treeview, each hierarchy is shown as a separate tree. Hierarchies are displayed horizontally across the Explorer.
By default, all hierarchy nodes are shown as expanded. You can roll up and expand nodes as required.
Having selected the node to which you wish to link the current node, you can invoke OK; this adds a new linked node to the bottom of the grid.
If you attempt to add a node that is already present in the grid, a message is displayed ('This node has already been linked. Please select a different node to link before clicking OK.').
You can also invoke Cancel, which removes the Hierarchy Explorer from display.
o Remove the selected Linked Node: this option is only available when a linked node is selected in the grid. Its invocation is protected by an 'Are you sure?' dialog and removes the selected node from grid.
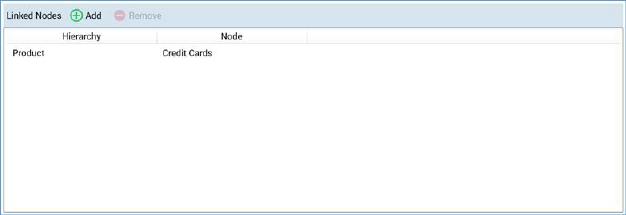
•Grid: the grid contains the following columns:
o Hierarchy: a read-only representation of the hierarchy from which the node was sourced.
o Node: a read-only representation of the name of the linked node.
When saving, a validation error is raised if a link has been created from the current node to a node from another hierarchy and one or more ancestor or descendent nodes from the other hierarchy.
Once a link has been created from the current node to a node in another hierarchy, it is necessary to define explicitly all other nodes in the other hierarchy to which the current node links.
If there are no links from the current node to another hierarchy then no restrictions will be imposed in linking an interaction linked to the current node to nodes within the other hierarchy.