
The Realtime Report header exposes the following:
•Show: clicking Show displays a dialog in which you can choose the type of items to be shown in the Realtime Report using the following checkboxes, which are all checked by default:
o External Web Pages
o Interactions
o Landing Pages
If a single item type is selected, its name is displayed at the property. If more than one is selected, ‘[n] Types’ is displayed at the property. If no types are selected, ‘No Types’ is shown. Changing the selection refreshes the tracked items list, and charts, automatically.
Note that interactions are displayed within the Realtime Report if they match the supplied filter criteria, and the date range selected intersects with the duration post-execution for which their fulfillment states continue to be monitored for updates.
•From: defaults to today - 1 month. Date from must be less than Date to.
•To: defaults to today. Date to must be more than Date from.
•Search by name: you can enter a search string to limit the items displayed in the Realtime Report to those with a name matching the entered value. The search is applied as soon as you stop typing in the field. A dropdown list of recent searches is available.
•Refresh: reloads the Realtime Report with the latest set of insight data across the supplied date range. Any newly-created items that match the specified filter criteria are added to the Tracked Items list. If all previously-displayed items were checked, any newly-displayed items are also checked. If not all previously-displayed items were checked, any newly-displayed items are not checked.
Note that, following a refresh of the Realtime Report, zero results are only displayed at charts if results are returned by execution of the query. If no results are returned, zero results are not shown.
•Filter States: you can limit the items displayed within the Realtime Report to only those with state results that match one or more selected states.
By default, only ‘Default states’ are shown. These are defined as Page Visit, Link Click, Form Submission (for web pages) and Targeted (for interactions). If only default states are currently selected, this setting reads ‘Default States’. This is the initial setting upon invocation of the Realtime Report.
If a single state has been selected, the text ‘[Context] - [State]’ is displayed.
If multiple states have been selected, [n] States is displayed.
Clicking the property displays the Choose States and Metrics dialog.
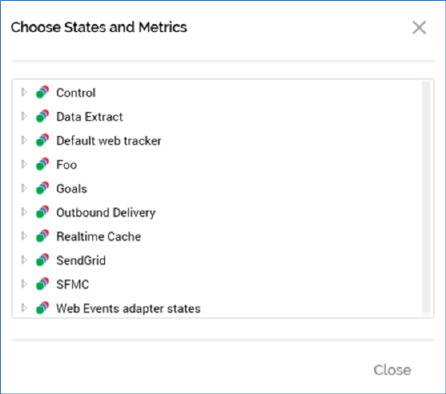
You can expand each group therein to reveal the states that they contain. Each state is accompanied by a checkbox. You can check those that you wish to view in the Realtime Report.
The dialog lists the following:
o Web events states: these include the following:
§ Form Submission
§ Link Click
§ Page Visit: note that the duration that is required to have passed before a page visit by a given visitor using a given browser is deemed to be recorded as a new page visit is controlled by Interaction web.config setting ThresholdBetweenPageVisitsMinutes.
§ Any custom web event states defined at the web events adapter
o Channel states: these are grouped by channel.
o Goals: you can choose to filter by goals defined as goal smart assets’ and landing pages’ optimization goals, and the latter’s additional goals.
o State Flow states
Having elected to apply a state filter, you can click the Clear the currently selected States button to revert to display of the default states.
•Group States: this option can be switched between Yes (the default) and No values. If set to Yes, states with the same name are grouped together at the Realtime Report charts; e.g. all ‘Targeted’ state counts are grouped together, even if collated at disparate channels, and all identically-named goals are counted together, even if the goals in question are defined at separate landing pages.
Note that if Group States is set to No, separate channels’ common states are shown separately (e.g. ‘Data Extract - Targeted’ and ‘Salesforce Marketing Cloud Email - Targeted’).
•More Filters: clicking More Filters allows you to filter the Realtime Report by web publish site (applicable to landing pages only) and RPI file system folder (applies to landing pages and interactions).
Clicking More Filters displays a dialog:
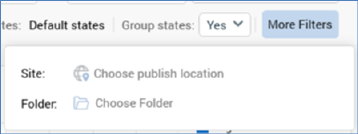
o Site: you can limit the items displayed in the Realtime Report to just those landing pages that have been published to a specific web publish site, or folder therein. Clicking Choose publish location displays the Choose Publish Location dialog. You can select a web publish site or folder and then click OK. When you do so, the Realtime Report is filtered to show only landing pages published to the selected location.
Having selected a site or folder, you can clear it.
o Folder: you can click Choose folder to select a folder using the Choose Folder dialog. When a folder has been selected, only landing pages and interactions saved to the selected folder are displayed in the Realtime Report.
Having selected a folder, a Search subfolders checkbox is displayed below Folder. If checked, all subfolders within the selected folder searched for files to display in the Realtime Report.
Also having selected a folder, you can clear it. When you do so, the selected folder and Search subfolders checkbox are removed, and the filter restriction is lifted.