
The Dimensions list is shown to the left of the Dimensions & Cells tab.
It lists the dimensions selected for the current cell list. Dimensions may be based on:
•Attribute values
•Selection rule targeting
•Input audience metadata attribute values
•Input audience segment membership
Each of these is discussed further below.
The Dimensions list contains the following:
•Toolbar, exposing the following options:
o Add a new Dimension: clicking this button displays a submenu, which exposes the following:

§ Add Dimension using Attribute: selecting this menu option displays the File System Dialog. You can select the attribute you require and invoke Choose the selected attribute to confirm your choice. You cannot choose an exists in table or parameter attribute. Having made your selection, a new, attribute-based dimension is added to the bottom of the Dimensions list.
Note that a warning message is displayed when the attribute's type is Exists in table; you cannot create a dimension based on attributes of this type.
In addition, attributes with names matching certain reserved words (e.g. ‘OutputName’) cannot be used as dimensions.
§ Add Dimension using Selection Rule: selecting this menu option displays the Choose Selection Rule File System Dialog. The dialog displays selection rule files only. You can choose a standard or basic selection rule from an accessible folder in the RPI file system and double-click or click OK to select it. NoSQL selection rules are not supported. The new, selection rule-based dimension is added to the bottom of the Dimensions list.
You can also cancel the File System Dialog, which closes it without creating a dimension.
§ Add Dimension using Metadata: if you select this menu option and an Input audience has not been selected, a message is displayed ('Please assign an Input audience to add metadata dimensions'). If an Input audience has been selected, the Choose Metadata Attribute dialog is shown.
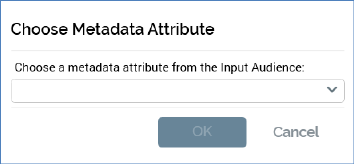
A dropdown lists all metadata attributes defined by the Input audience’s audience definition. Selecting a metadata attribute displays the OK button, and invocation of OK creates a new dimension using the metadata attribute. The new, metadata-attribute based dimension is added to the bottom of the Dimensions list.
You can click Cancel to close the Choose Metadata Attribute dialog. Clicking off the dialog has the same effect.
A validation error is raised if you add the same dimension to the cell list more than once.
Note that you can also add dimensions by dragging one or more attributes or selection rules from the toolbox and dropping them directly onto the Dimensions list.
o Move the selected Dimension up: this button is only enabled when a dimension other than the first in the list is selected. Invocation moves the dimension up one position in the list.
o Move the selected Dimension down: this button is only enabled when a dimension other than the last in the list is selected. Invocation moves the dimension down one position in the list.
o Remove the selected Dimension: invocation of this option removes the selected dimension from the Dimensions list and is protected by an ‘Are You Sure?’ dialog.
•List: initial display of a cell list’s Dimensions list shows the message 'No dimensions have been added'. Once one or more dimensions have been added to the cell list, they are displayed in the Dimensions list.
Dimensions are list in the order in which they were added to the cell list (unless moved up or down manually thereafter).
For each dimension, the following are displayed:
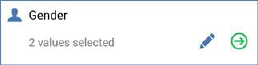
o [Icon]: specific to the dimension type.
o [Name]: of the attribute, selection rule or metadata attribute; if the dimension is based on Input audience segments, its name is ‘Audience Segment’. A dimension’s name is read-only.
o ‘No | [n] values selected’: this text reflects the number of values currently selected for the dimension.
o Choose Dimension Values: invocation of this button displays the Choose [Dimension Name] Dimension Values dialog, which allows you select values from a dimension that are of relevance to the current cell list.
Note that you cannot use an anonymous auxiliary database-resolving selection rule or an anonymous auxiliary database attribute as a cell list dimension.
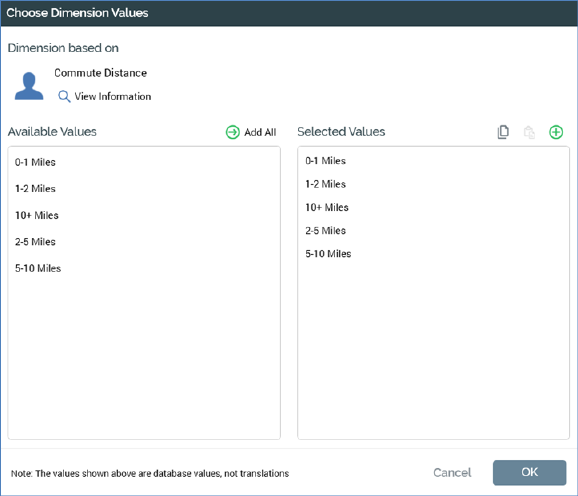
Note that all values displayed in the Choose Dimension Values dialog are database, not translation, values. A message shown at the bottom of the grid confirms this fact.
The dialog contains the following:
§ Dimension Based On: the section at the top of the dialog provides a summary of the item upon which the dimension is based.
The information shown depends on the type of item the dimension is based on:
•Attribute: an icon accordant with the attribute’s target table is displayed along with its name. A View Information button gives access to the File Information dialog, in which the attribute’s details are displayed.
•Selection rule: the selection rule icon is displayed along with its name. A View Information button gives access to the File Information dialog, in which the selection rule’s details are displayed
•Metadata attribute: a generic icon is shown alongside the metadata attribute’s name.
•Audience segment: the audience icon is displayed along with the Input audience’s name.
§ Available values list: this section lists the dimension’s values. An Add All button is displayed at the top of the list. Invocation adds all values not currently in the Selected values list to that list. Values in the Available values list are ordered alphanumerically.
If a dimension is based on an attribute, the number of distinct attribute values listed is accordant with config setting AttributeValueListSize. Where a greater number of distinct values than the configured limit exists, an advisory message is displayed. When attribute values have not cached, a message ('Values have not been loaded for this dimension') and button ('Start loading values') are shown. Clicking the button starts the loading of attribute values (note that attribute values are loaded in the background irrespective of whether the button is clicked).
If a dimension is based on a selection rule, the values 'Y' and 'N' are listed – the former representing those records that are targeted by the selection rule, the latter those that are not.
If a dimension is based on a metadata attribute, all distinct metadata attribute values as defined in Input audience are listed.
An ‘Add this value to the list of selected values’ button is displayed when you hover over an available value. Clicking the button adds the value to the Selected values list. Double-clicking the value has the same effect.
A warning message is shown when you attempt to add the same value to the Selected values list more than once.
§ Selected values list: this section lists all values selected for the current dimension. It consists of a toolbar and a list.
•Toolbar: exposing the following options:
o Add a custom value to the list of selected values: this button is displayed at the top of the Selected values list for attribute-based dimensions only. Invocation adds a new value to the bottom of the Selected values list. If a string attribute, the new value’s default value is 'New value'. If 'New value' already exists, the new value is 'New value 2' (this value can be incremented). If an integer or decimal attribute, the new value’s default value is '0'. If '0' already exists, the new value is '1' (this value can be incremented if required). If a date attribute, the default value is set to Now.
o Copy values to clipboard: this button is available when one or more selected values are present in the Selected Values list. Clicking it copies the values in question to the clipboard. Null values are not copied.
o Paste values from clipboard: invocation of this option displays a submenu:
§ Replace existing Values: selecting this option removes the existing Selected Values and replaces them with values pasted from the clipboard.
§ Add to existing Values: selecting this option appends the contents of the clipboard to the Selected Values list. Values are pasted in appropriate alphabetical positions. Any existing or duplicate values are not added (a warning message is displayed in this case).
Note that data pasted must be compatible with the criterion's attribute's data type. Values pasted must be database values, not translations.
•List: this section displays the selected dimension values. Values are ordered alphanumerically.
If the dimension is based on an attribute, the currently-selected value is writeable; if you desire, you can overwrite the value sourced from the database.
Note that a validation error is raised if more than one identical selected value is listed.
A ‘Remove this value from the list of selected values’ button is displayed when you hover over a selected dimension value. Clicking the button removes the value from the list. An ‘Are You Sure?’ dialog is not shown.
Note that removing a dimension value sets the value of any cells to which that value is assigned to ‘Any’.
§ OK: invocation of this option removes the dialog from display and applies any changes made. The dimension as shown in the Dimensions list is updated to show the current number of selected values.
§ Cancel: invocation of this option removes dialog from display without applying any changes made.
o Generate Cells for this Dimension: invocation of this option adds at least one cell per selected dimension value to the Cells list.
If the grid already contains cells generated from another dimension’s values, one cell per unique dimension value combination is created.
If another dimension has been selected, but no cells generated based on its values, 'Any' is displayed in the dimension column in the grid.
If one or more cells have been deleted from the Cells list, on invocation of Generate…, any 'gaps' (based on unique dimension value combinations) are 'filled in' by the creation of new cells. Any relevant 'Any' settings are replaced by explicit values.
Newly-generated cells' Code Values are provided if a Cell code format has been defined.
The maximum number of cells that can be added to a cell list is defined by system configuration setting MaxCellListTemplateCells. Note that if this setting’s value is decreased such that it is lower than the number of cells within an existing cell list, the existing template is not affected.
If the maximum number of cells is reached during cell generation a message is displayed:
‘The maximum amount of allowed cells was reached. [n] cell(s) were added’
A confirmatory message is displayed post-cell generation.
A context menu, containing a single option (Open Latest Version) is available when you right-click a selection rule dimension only (the option is not available for attribute, metadata and audience segment-based dimensions). Invocation opens the selection rule in question in the Rule Designer. If the rule is already open, it receives the focus.
A validation error is displayed when a cell list contains no dimensions. A validation error is also raised when a dimension based on the same source item is present in the Dimensions list.
Another Add Dimension button is displayed below all configured dimensions.
An instructional message appears at the bottom of the Dimensions list:

The contents of the Dimensions list are synchronized with the Cells list - one column per listed dimension is shown in the Cells list.
Columns are ordered from left to right as per the top to bottom order in the Cells list. Removing a dimension removes the related column in the Cells list.