You can add an activity to the interaction by dragging it from the toolbox and dropping it onto the workspace.
When you drag an activity from the top (activities) section of the toolbox and drop it onto the workspace, a new, unconfigured activity of the appropriate type is created.
When you drag a file from the bottom (search/folders) section of the toolbox and drop it onto the workspace, a pre-configured activity of the relevant type is added (e.g. dropping an offer onto the workspace creates a new offer activity). You can also drag a file and drop it onto an activity of an appropriate type to configure the activity (e.g. dropping an audience onto a batch audience configures the batch audience with the template).
When dragging an activity across the workspace, a label is displayed alongside the cursor:
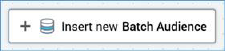
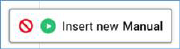
•When you are able to drop an activity dragged from the activities section to create a new, unconfigured activity, the label reads ’Insert new [name of activity]’.
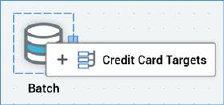
•When you are able to configure an existing activity by dropping a file dragged from the toolbox onto it, the label appears as follows:
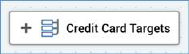
•When you are able to create a new activity by dropping a file dragged from the file system treeview, the label appears as follows:
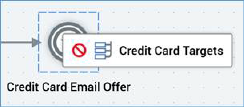
•When you are unable to drop a file dragged from the file system treeview (for example, trying to drop an offer onto a batch audience), the label displays the filename, along with a ‘no drop’ icon.
•When you drag an activity or file over the RPI interface other than the Interaction Designer workspace, an icon indicates it is not possible to drop the item.
At the point of dragging an activity from the activities section over the workspace, all existing activity highlights are removed.
When you drop an activity from the activities section onto the workspace, an icon representation of the new activity, along with its default name, are displayed within the workspace.
A new activity is named in accordance with its activity type or file name (e.g. a new, unconfigured batch audience is named ‘Batch’; an offer activity based on offer ‘Credit Card Email Offer’ is given an identical name). If an activity with the same name exists already in the workspace, an integer is appended to the activity name to ensure uniqueness; this number may be incremented if required.
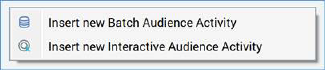
If you drag an audience from the file system treeview and drop it onto the workspace, the system queries whether you wish to create a batch audience or interactive activity, preconfigured with the audience.
Your choice made, an activity of the appropriate type is added to the workspace and configured automatically with the selected audience. The name of the new audience activity is the same as the audience you dragged (if an identically-named activity exists already, an integer is appended to the name to ensure uniqueness (and can be incremented if required)).
When you drag an offer that supports at least one broadcast and one non-broadcast delivery method onto an interaction, a context menu is displayed:
•Insert new Offer Activity: upon creation of the offer activity, any default non-broadcast channels are added automatically.
•Insert new Broadcast Activity: upon creation of the broadcast activity, any default broadcast channels are added automatically.
When you drag an offer that supports exclusively non-broadcast or broadcast delivery methods onto an interaction, the context menu is not displayed. If the offer supports exclusively non-broadcast delivery methods, an offer activity is created. If the offer supports exclusively broadcast delivery methods, a broadcast activity is created.
Default broadcast channel(s) are not added automatically at the addition of an empty broadcast activity to an interaction. Channel(s) are only added after selection of an offer supporting broadcast delivery method(s).
You can drag a data process project from the toolbox and drop it onto the workspace to create a data process activity that is pre-configured with the selected data process project. If configured with a custom icon, that icon is used to represent the data process activity in the workspace.
If an activity exists within the workspace that is not part of an existing workflow, a validation error relating the existence of the orphaned activity is shown.